
Like guides like this? Get new ones by email.
I hiked Angels Landing in May 2024 with five friends, and it’s still one of the best hikes I’ve ever done — a genuine 5-out-of-5, bucket-list day. It’s also one of the most exposed, talked-about trails in the country: a narrow rock spine with chains, sheer drops, and a summit view that makes the whole nerve-wracking climb worth it. Here’s my honest first-hand account — and everything you need to know to hike it yourself.
Plan your visit: Check the official Zion Angels Landing permit page for current permit lotteries, and see our full Zion National Park guide for the rest of the park.
The Quick Stats
- Distance: ~5 miles round trip
- Elevation gain: ~1,500 ft
- Difficulty: Strenuous — plus serious exposure
- Time: 3–5 hours
- Permit: Required (lottery) for the chained section
- Where: Zion National Park, Utah
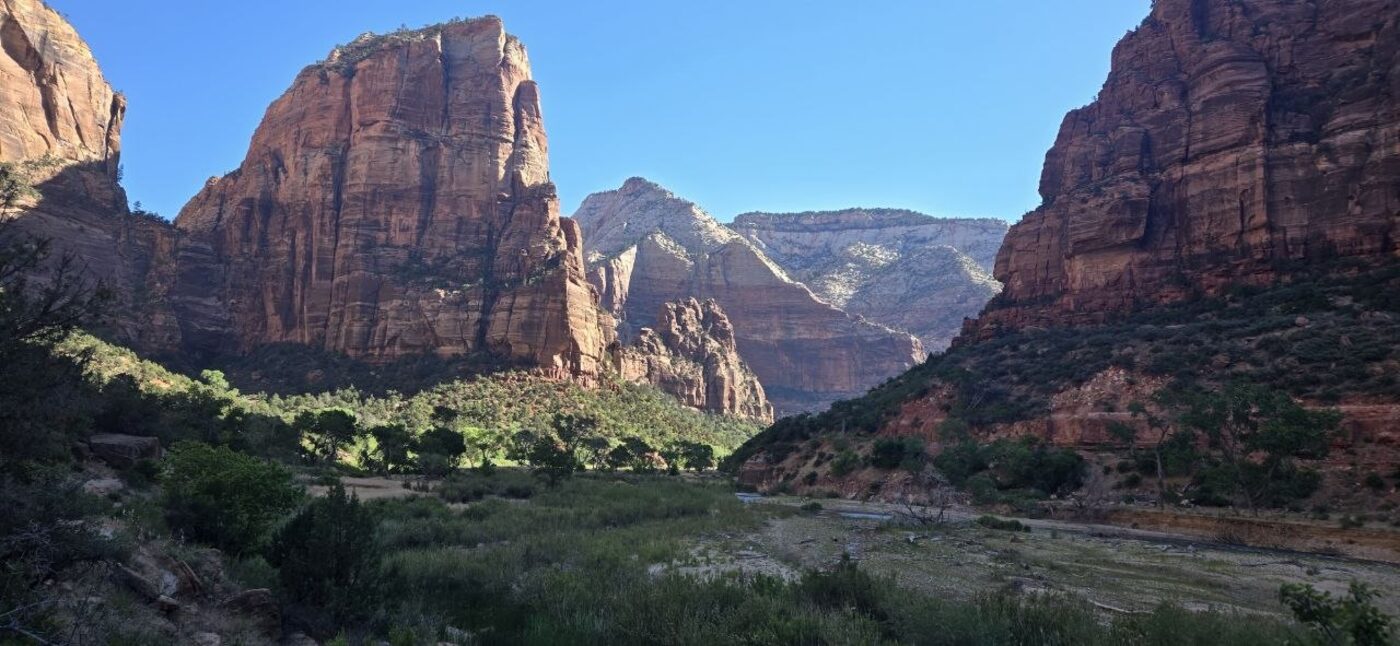 Angels Landing rising from the canyon floor — the monolith you’re about to climb, seen from the valley.
First: You Need a Permit Now
Since 2022, you need a permit to hike the chained section of Angels Landing (past Scout Lookout), issued by lottery on Recreation.gov — a seasonal lottery you enter months ahead, plus a day-before lottery for last-minute shots. It’s competitive.
Honestly, my friend handled the permit for the six of us, so I can’t tell you much about the process beyond this: we were lucky to get it. Plan on entering the lottery early, and have a backup plan in case you don’t draw one (Scout Lookout, the Narrows, and plenty of other Zion hikes are all worth it too).
One thing I learned the hard way: the headcount on your permit is enforced exactly, no exceptions. We showed up with two extra people beyond what our permit covered, figuring rangers would just wave them through with the group — they didn’t. Whatever number is on the permit is the number that goes up the chains. Plan your group size before you enter the lottery, not after.
The Climb to Scout Lookout
From the Grotto shuttle stop, the West Rim Trail climbs steadily through Refrigerator Canyon and up Walter’s Wiggles — 21 tight switchbacks chiseled into the cliff. Here’s my honest warning: I wasn’t in great shape at the time, and this part crushed my legs. Everyone talks about the chains, but the climb to the famous part is a real leg-burner. Don’t underestimate it — pace yourself and save some gas for the spine.
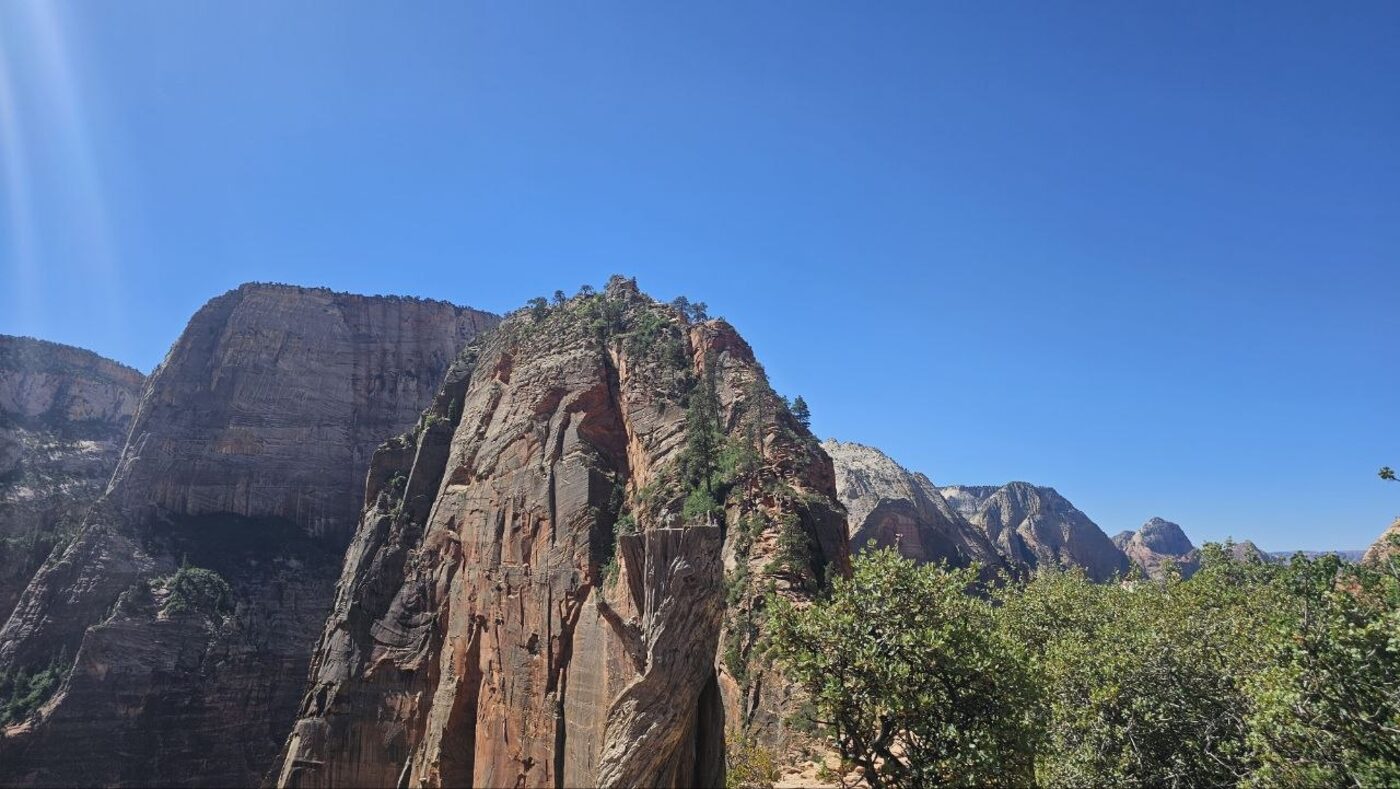 Looking up at the final spine from near Scout Lookout — the chained route climbs that fin all the way to the summit.
The Chained Section (The Main Event)
From Scout Lookout, the last half-mile is the reason people come — and the reason people are scared. It’s a narrow rock spine with chains bolted into the sandstone and sheer 1,000+ foot drops on both sides.
Here’s what genuinely surprised me: it’s a free-for-all. I expected rangers up there directing the flow of traffic — there aren’t any. It’s entirely on you and everyone else to have common hiking courtesy: yield, communicate, and let people squeeze past on the narrow sections. That courtesy matters a lot that high up. And frankly, there were a lot of people I thought shouldn’t have been up there — some were walking on all fours, frozen by the heights.
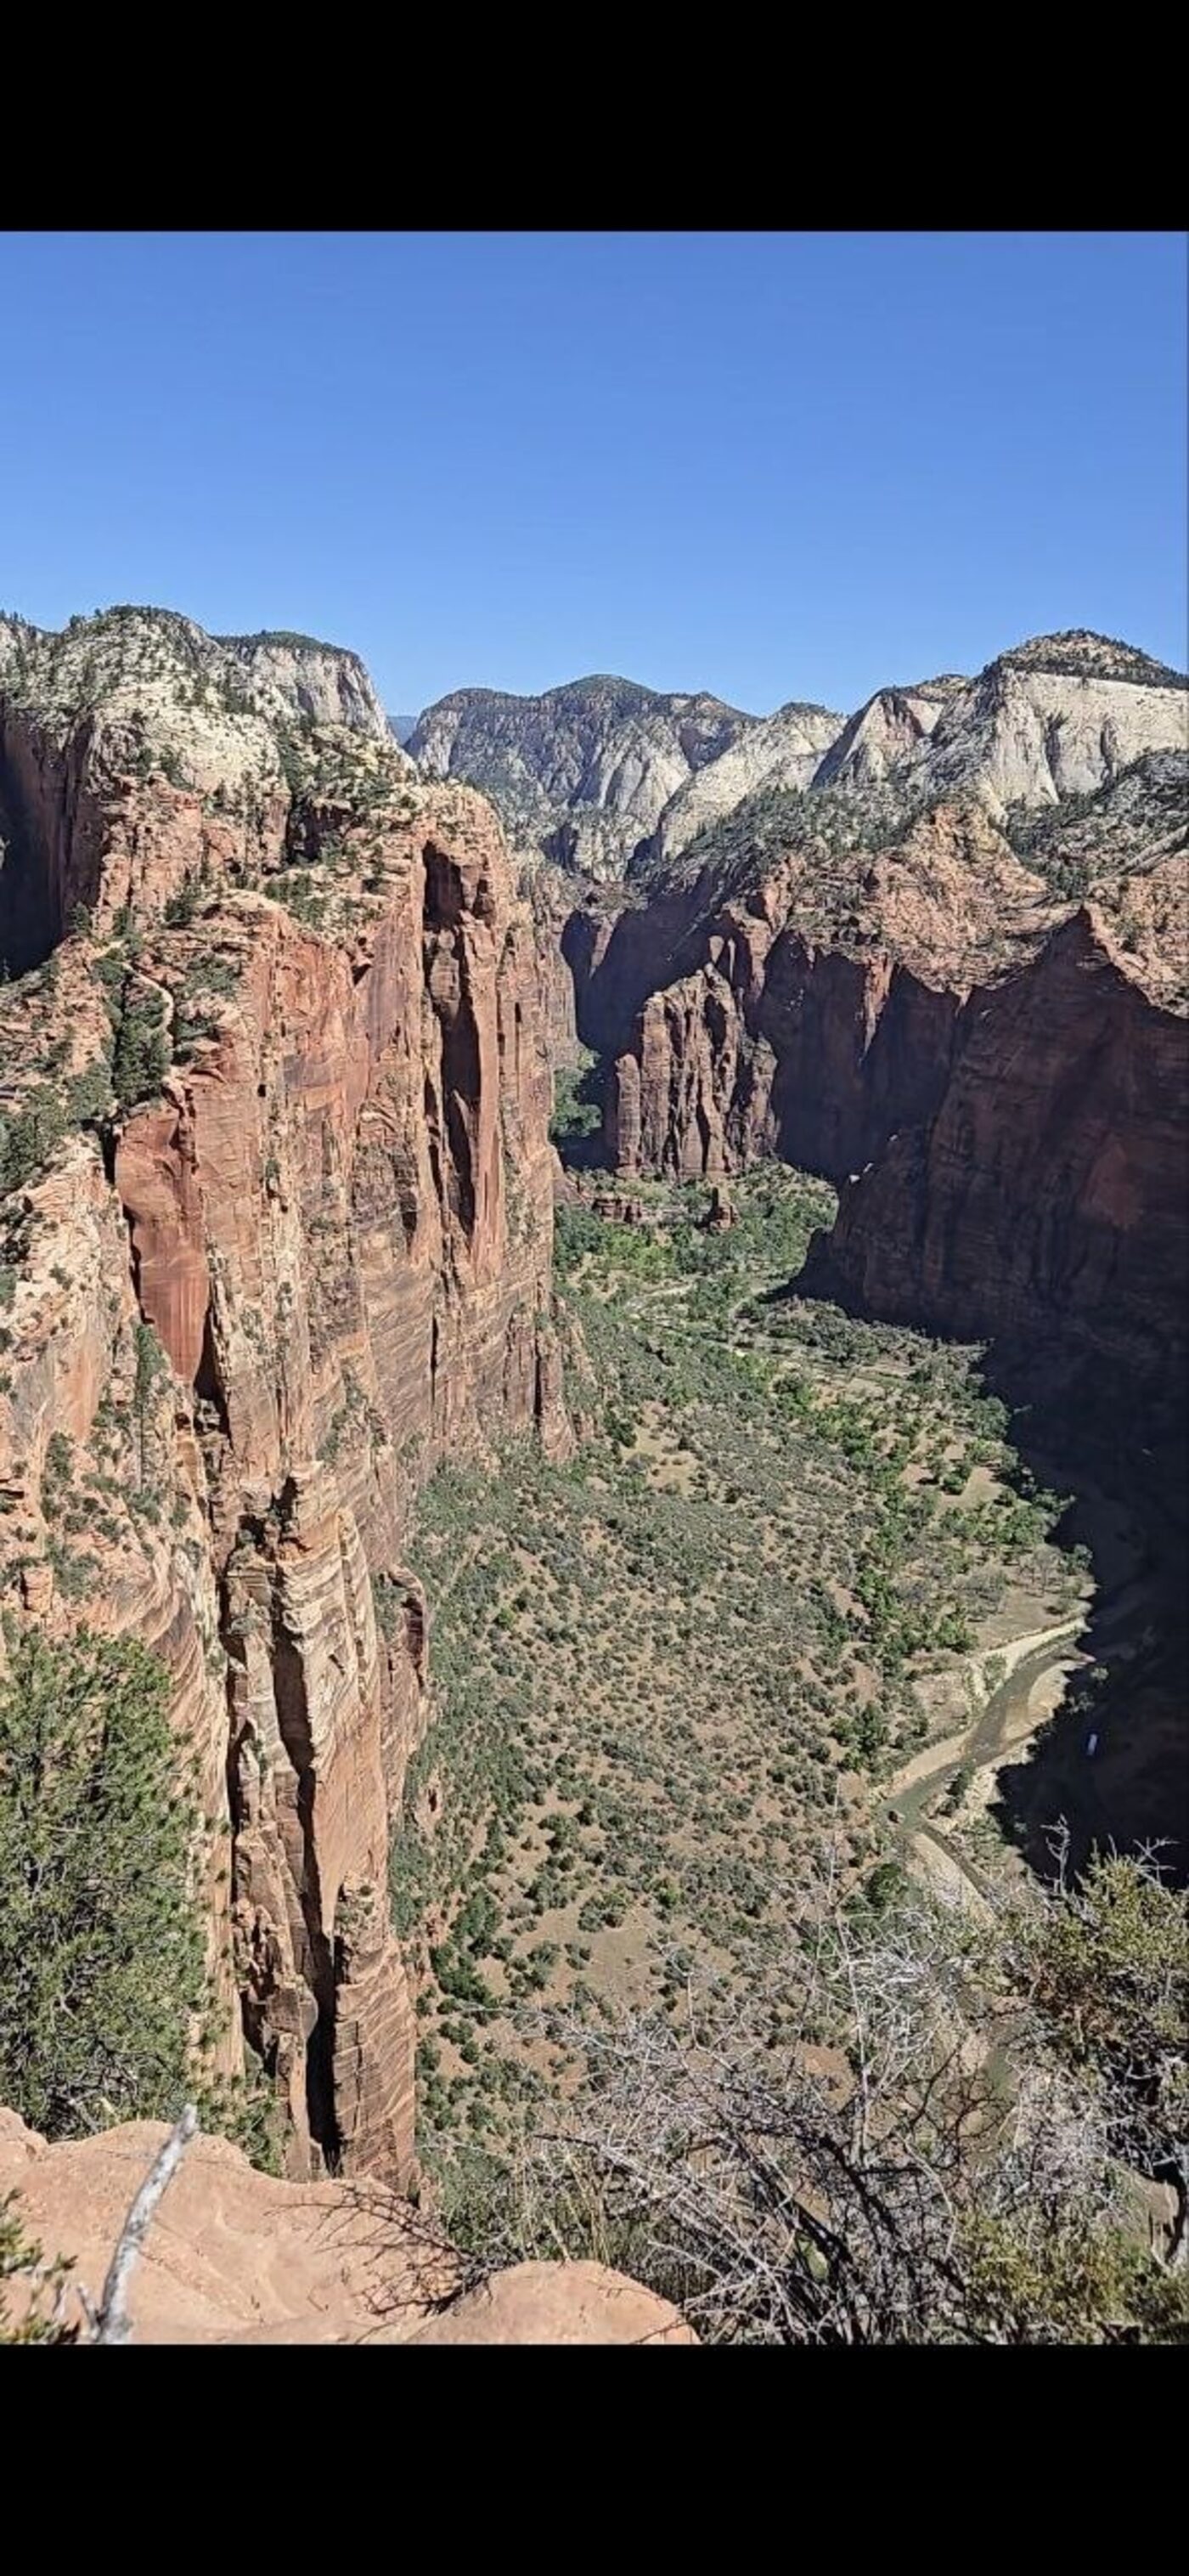 The exposure is real — a straight-down look at the canyon floor from the spine.
I got a little vertigo myself on the chains. And the moment that really shook me: a condor soared out over the canyon — below me. Realizing I was looking down at a bird in flight rattled me more than the drop-offs did. That’s not how your brain expects to see a bird, and it drives home just how high up you are.
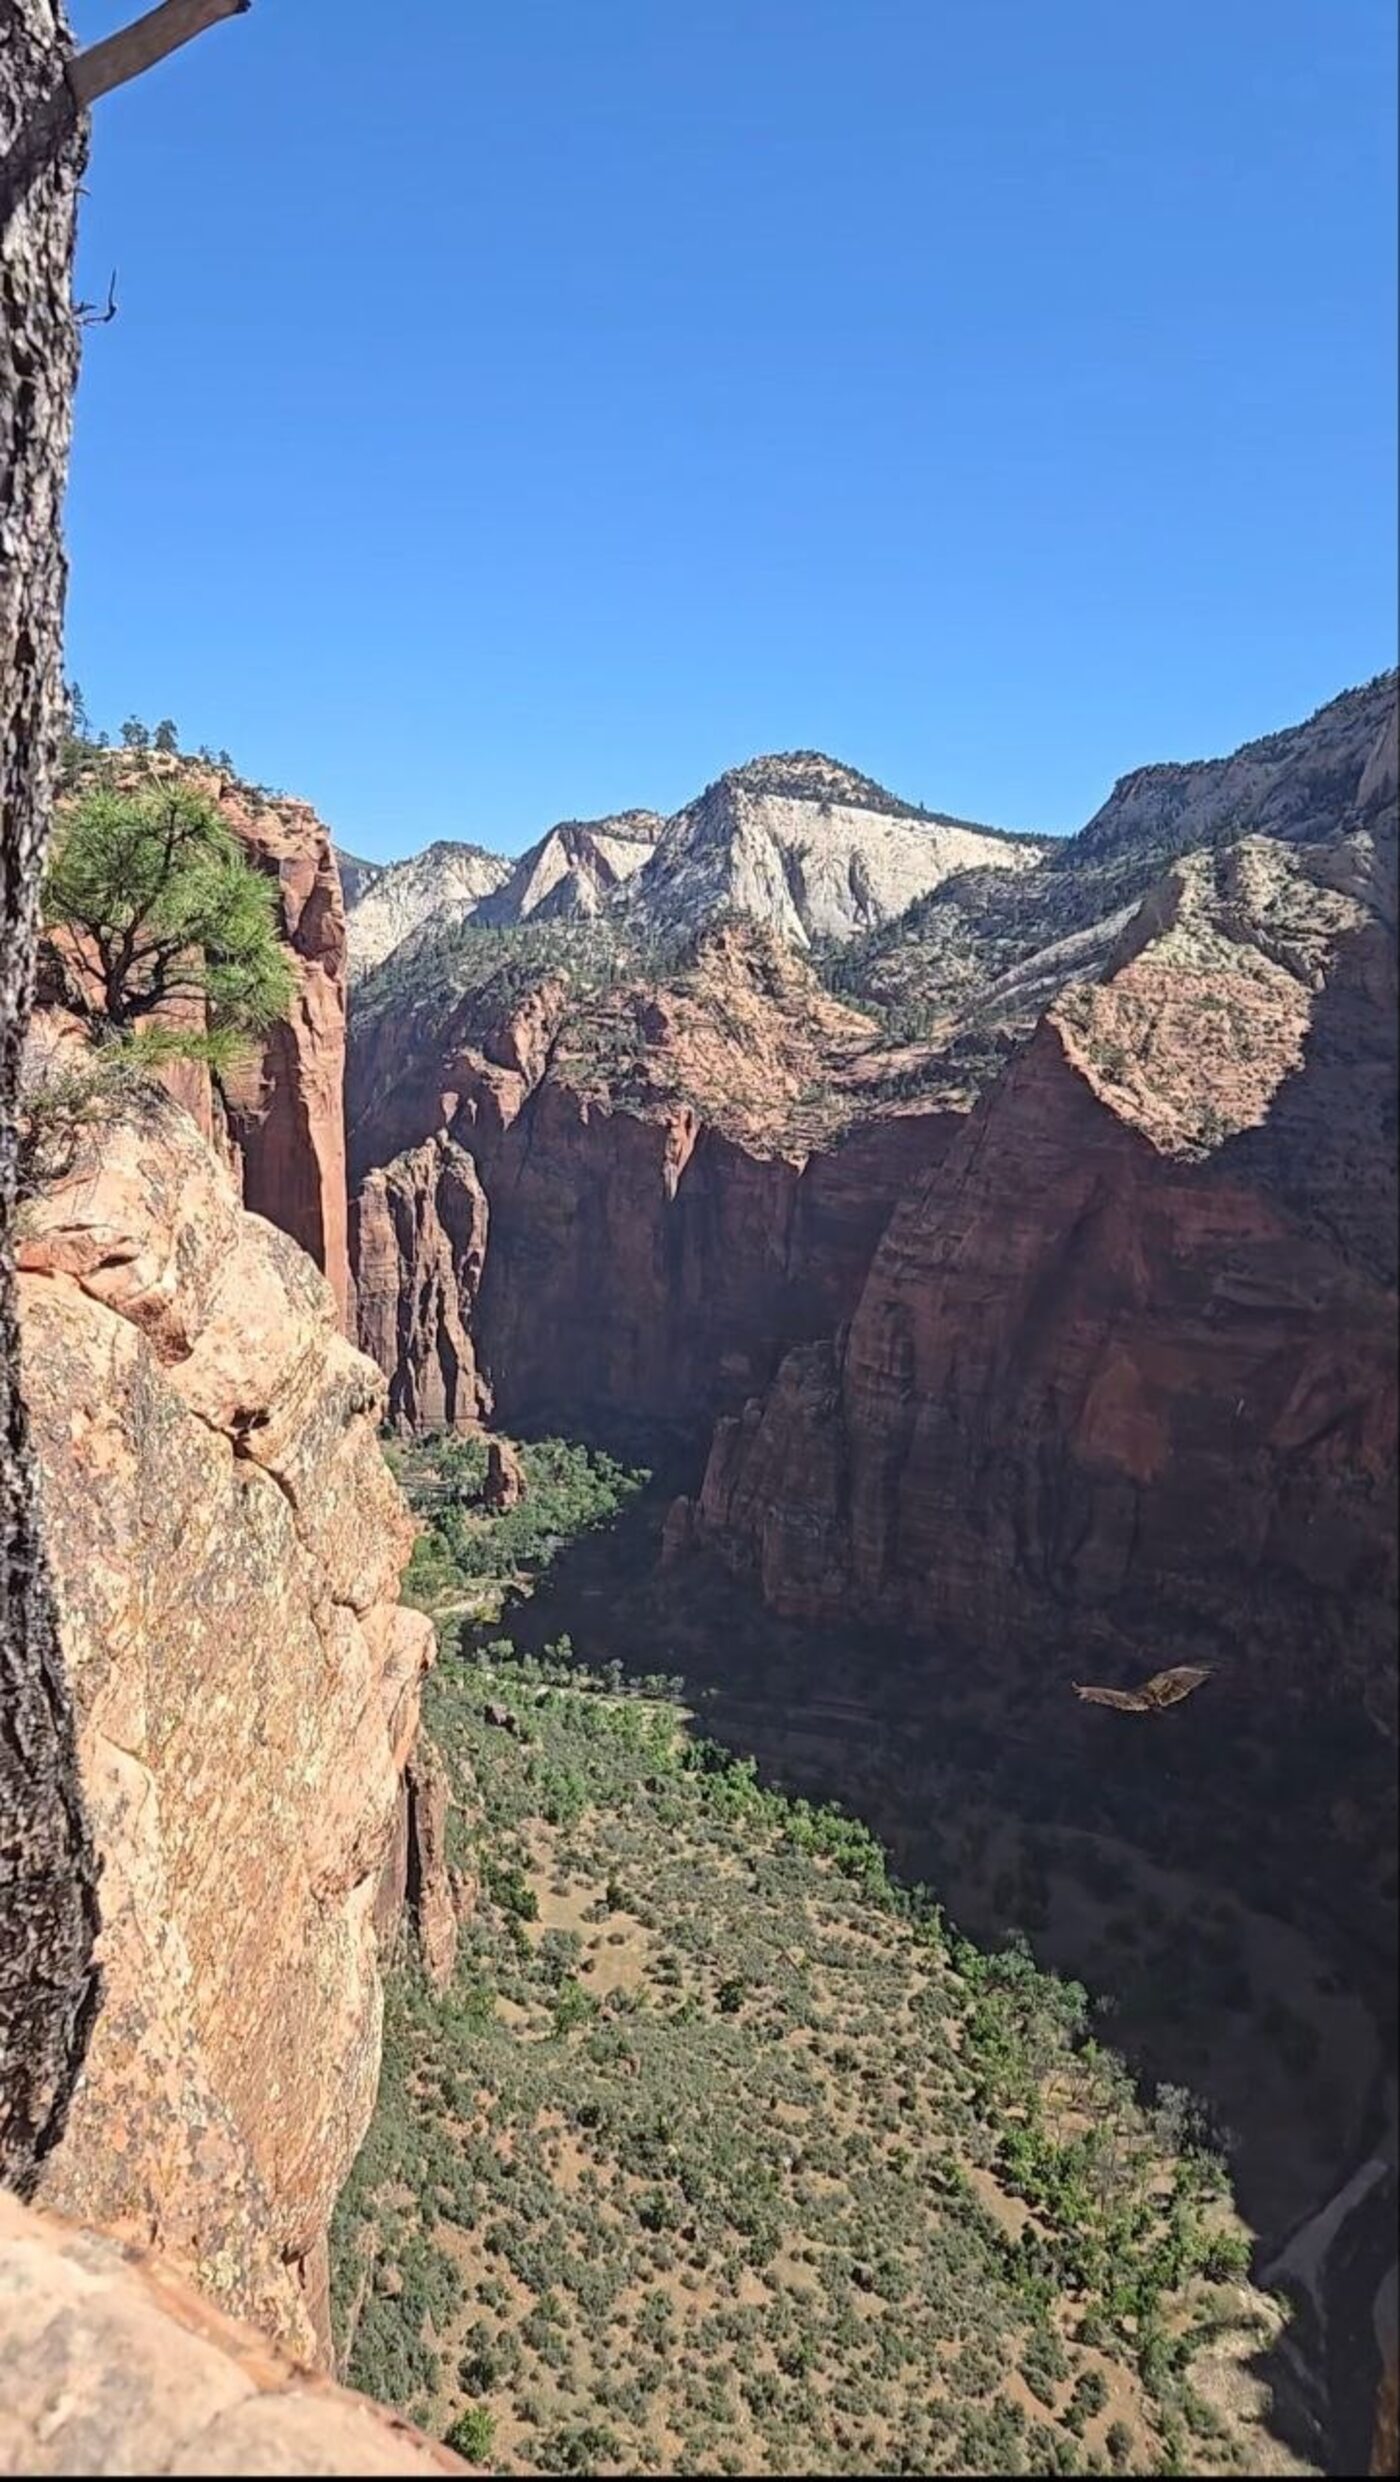 The moment that got me: a condor soaring over the canyon — below me. Looking down at a bird in flight is not something your brain is ready for.
My tips for the chains: go slow, keep three points of contact, actually use the chains, yield to hikers coming down, and don’t force it if the rock is wet or if the crowds are making you panic. There’s no shame in turning around at Scout Lookout.
The Summit
The views from the top were awesome — Zion Canyon stretching out in every direction — but honestly the best part was the vibe. Everyone up there was friendly and happy, taking pictures for each other, chatting with fellow hikers about the climb. We just soaked it in. After the tension of the chains, the summit felt like a celebration.
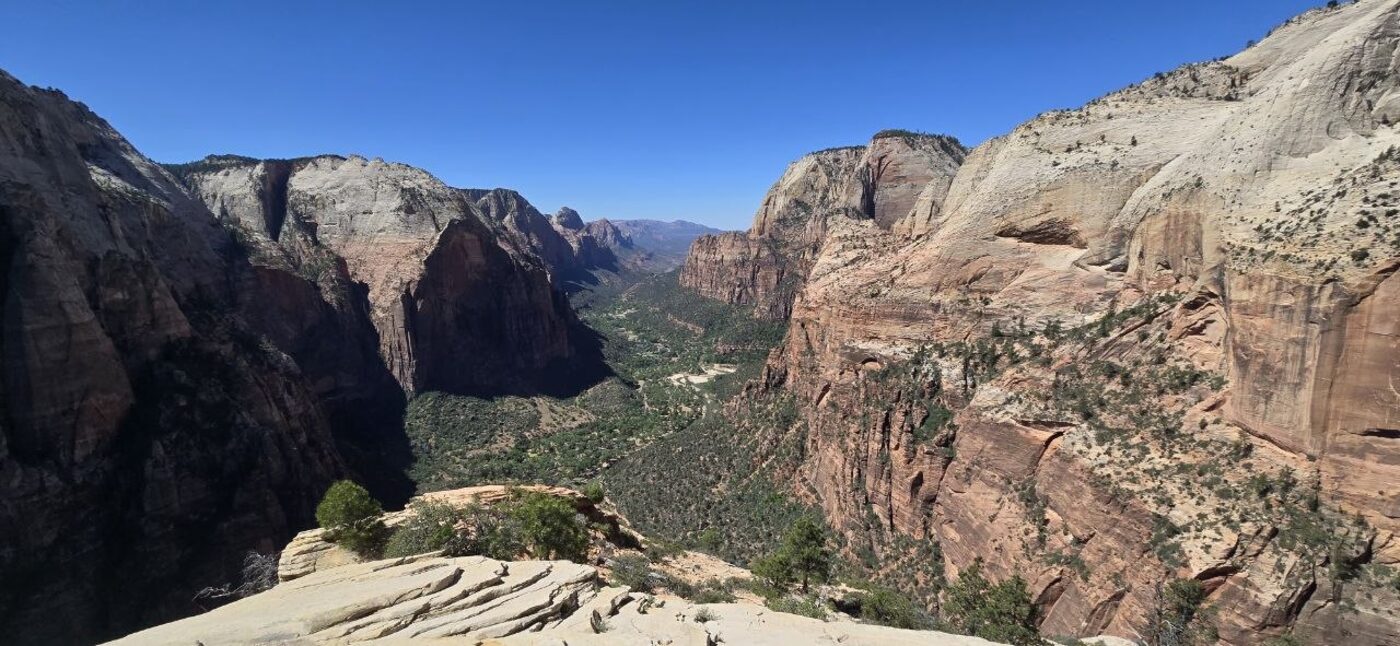 The payoff: Zion Canyon from the summit.
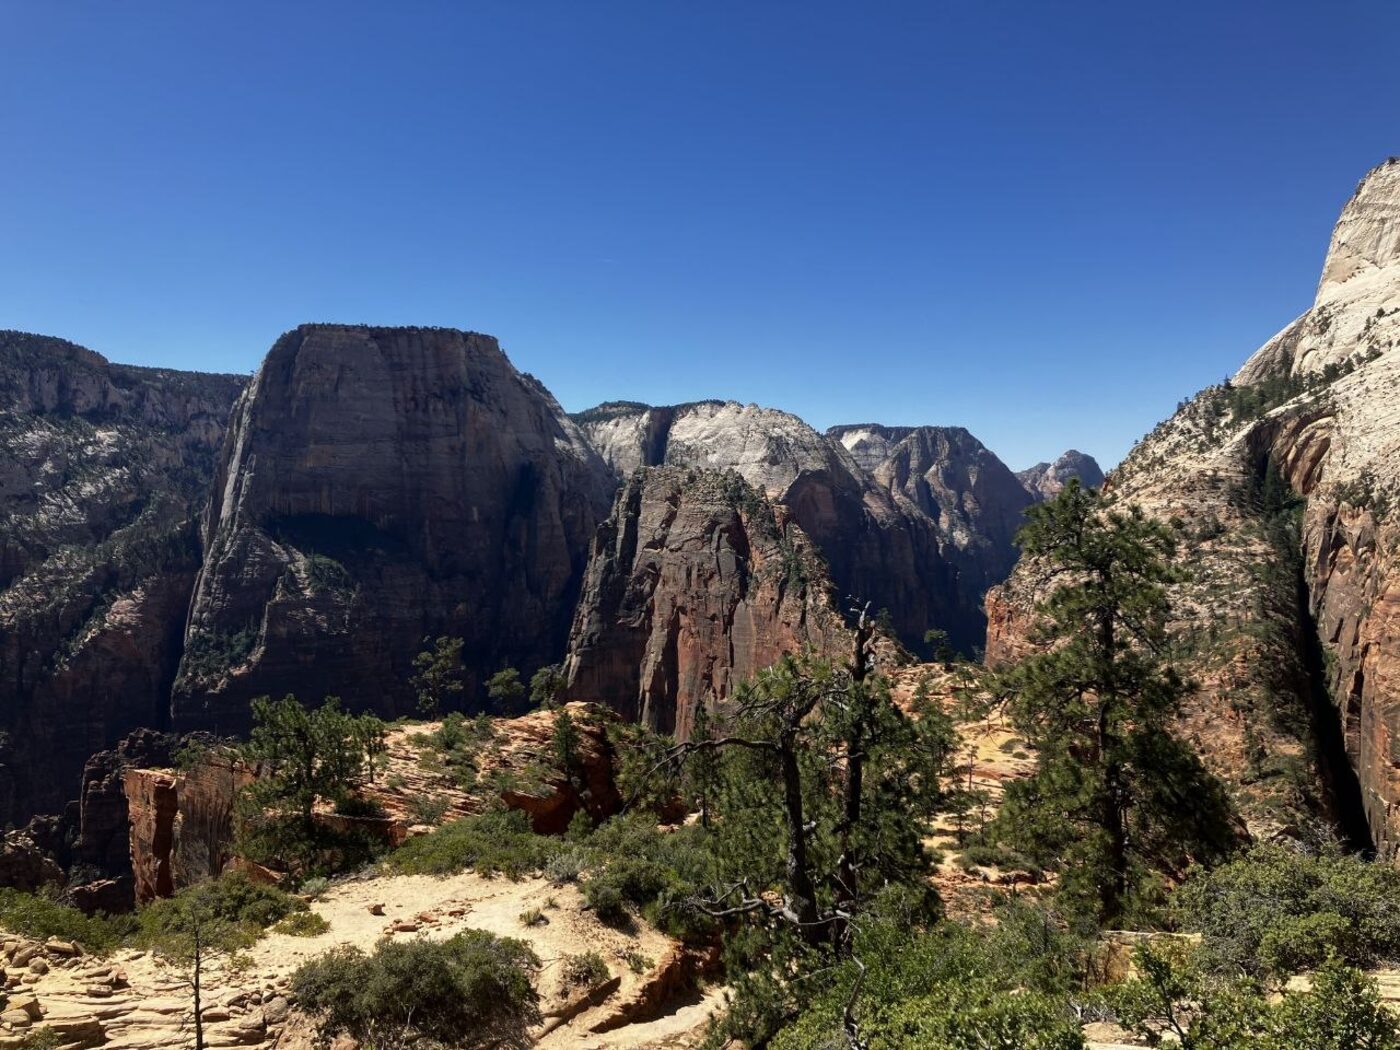 Near the top — the fin, the canyon, and a whole lot of air.
Safety: This Is a Real-Deal Exposed Hike
Don’t let the crowds fool you into thinking it’s casual. People have died falling from Angels Landing. There are no railings — just chains — and the drops are sheer. Be honest with yourself about heights: if serious exposure would freeze you up, this isn’t your hike, and that’s completely okay. Go slow, keep three points of contact, yield, and never attempt the spine when the rock is wet or icy.
When to Go & Timing
We drew an early-morning permit, and I think that’s the better slot — it was cooler and (I’d bet) less crowded than midday. Zion bakes: we hiked in temps in the 90s°F, and the exposed red rock throws heat back at you. Spring and fall are the sweet spot; summer midday is brutal. Whenever you go, start as early as your permit allows.
What I’d Do Differently (Lessons Learned)
Two honest mistakes I made:
- Better shoes. I wore regular running shoes and they were slick on the red rock, especially with a little dust or dirt on the soles. Grippy trail runners or hiking shoes would have made the slickrock and the chains feel far more secure. Traction genuinely matters here.
- More water. I brought about 40 oz and drank every drop, sweating hard in the 90°F heat. Bring more — I’d carry 2–3 liters next time. See how much water to carry and our hot-weather hiking guide.
Add solid sun protection (hat, sunscreen, sunglasses) and you’re set.
Tips for First-Timers
- Enter the permit lottery early and have a backup plan.
- Start early — cooler and quieter.
- Grippy shoes, 2–3 L of water, sun protection.
- Practice trail courtesy on the chains — yield and communicate.
- Be honest about heights — don’t push past your limit on the spine.
- Three points of contact, take your time. The mountain isn’t going anywhere.
Bottom Line
Angels Landing is a 5 out of 5 for me — one of the best hikes I’ve ever done. If you’re serious about hiking and heights don’t bother you too much, it’s a genuine bucket-list trail: the climb, the chains, the condor, the summit, and the good people up top all add up to a day I’ll never forget. I’d do it again — and I will.
Related Guides
- 📚 National Park Guides — 15+ parks
- Zion National Park: Best-Kept Secrets
- Hot Weather Hiking: Beat the Heat
- How Much Water to Carry
- Best Hiking Footwear
Go Light. Go Far. Live Wild.
Frequently Asked Questions
Do you need a permit to hike Angels Landing?
How dangerous is Angels Landing?
How long and hard is the Angels Landing hike?
Get the Sub-10 lb Ultralight Gear Checklist
Join the free PackLite Life newsletter — new gear guides, trip reports, and trail-tested tips — and grab the printable checklist when you sign up. No spam, unsubscribe anytime.